
Anda bisa Bahasa Indonesia? Baca artikel terjemahannya di sini!
One common use case for a NAS, aside from storing data, is to use it as a Media Server. In a nutshell, you can store your favorite films or other media in your NAS, and then stream them from anywhere, either inside or optionally, outside your network.
For this case, I’ve been using Plex ever since I bought my NAS. However, recent news indicate that Plex is removing Remote Play from their free plan, which is very disappointing. They will put the feature behind Plex Pass or the new Remote Watch Pass subscription plan. Additionally, they’re also planning to raise the Plex Pass prices (Lifetime plan will be $249.99, which is more than twice the current price). As for the new Remote Watch Pass, it will cost $1.99 / month or $19.99 / year. To be fair, it is said that it’s been a decade since Plex last updated their pricing, so this could be a long time coming. Those price updates will be effective starting April 29, 2025.
Anyway, I can’t allocate any budget to jump into the paid bandwagon. So, I think it’s time for me to part with Plex and look for an alternative. Fortunately, after a bit of digging around, I think I’ve found a viable alternative: Jellyfin.
So, in this article, I’ll share the steps I’ve taken to install Jellyfin on my Synology NAS. Hopefully, it will be useful. So, let’s get to it!
Installing + Setting Up Jellyfin
Unlike Plex, which is installed through Synology Package Center, Jellyfin is installed through Docker or Container Manager. In case you haven’t installed it, you can install Container Manager through Package Center.
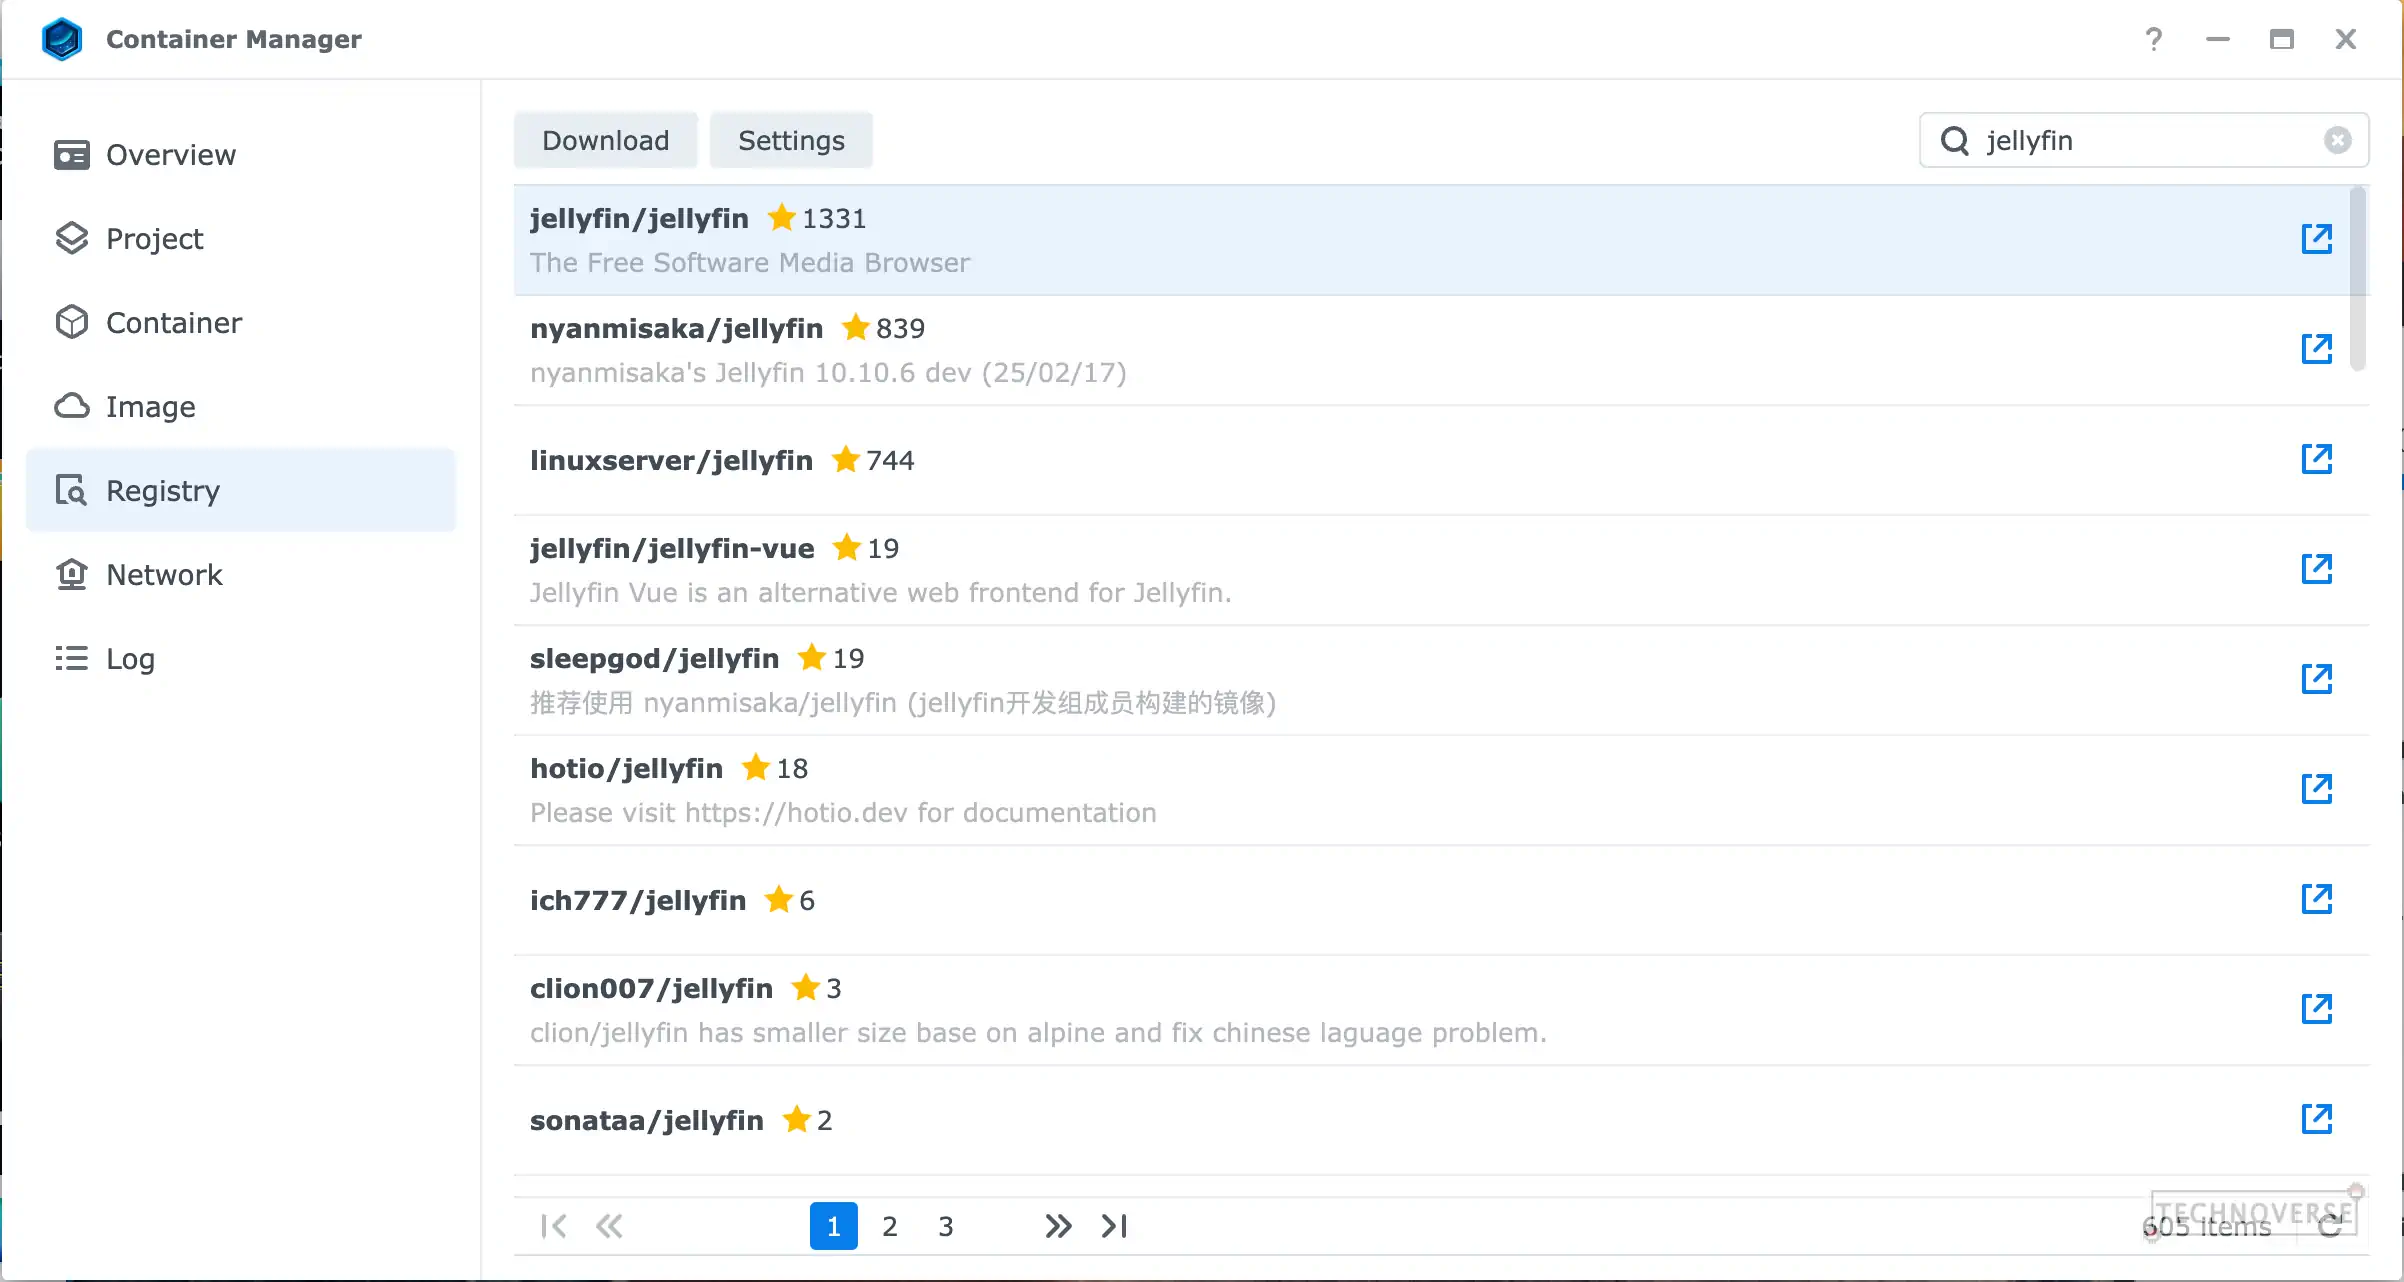
Once you’ve installed it, make sure to add jellyfin/jellyfin into your Registry and download the latest image. Once the image is downloaded, you can create and start the container right away. Here are some details to help you:
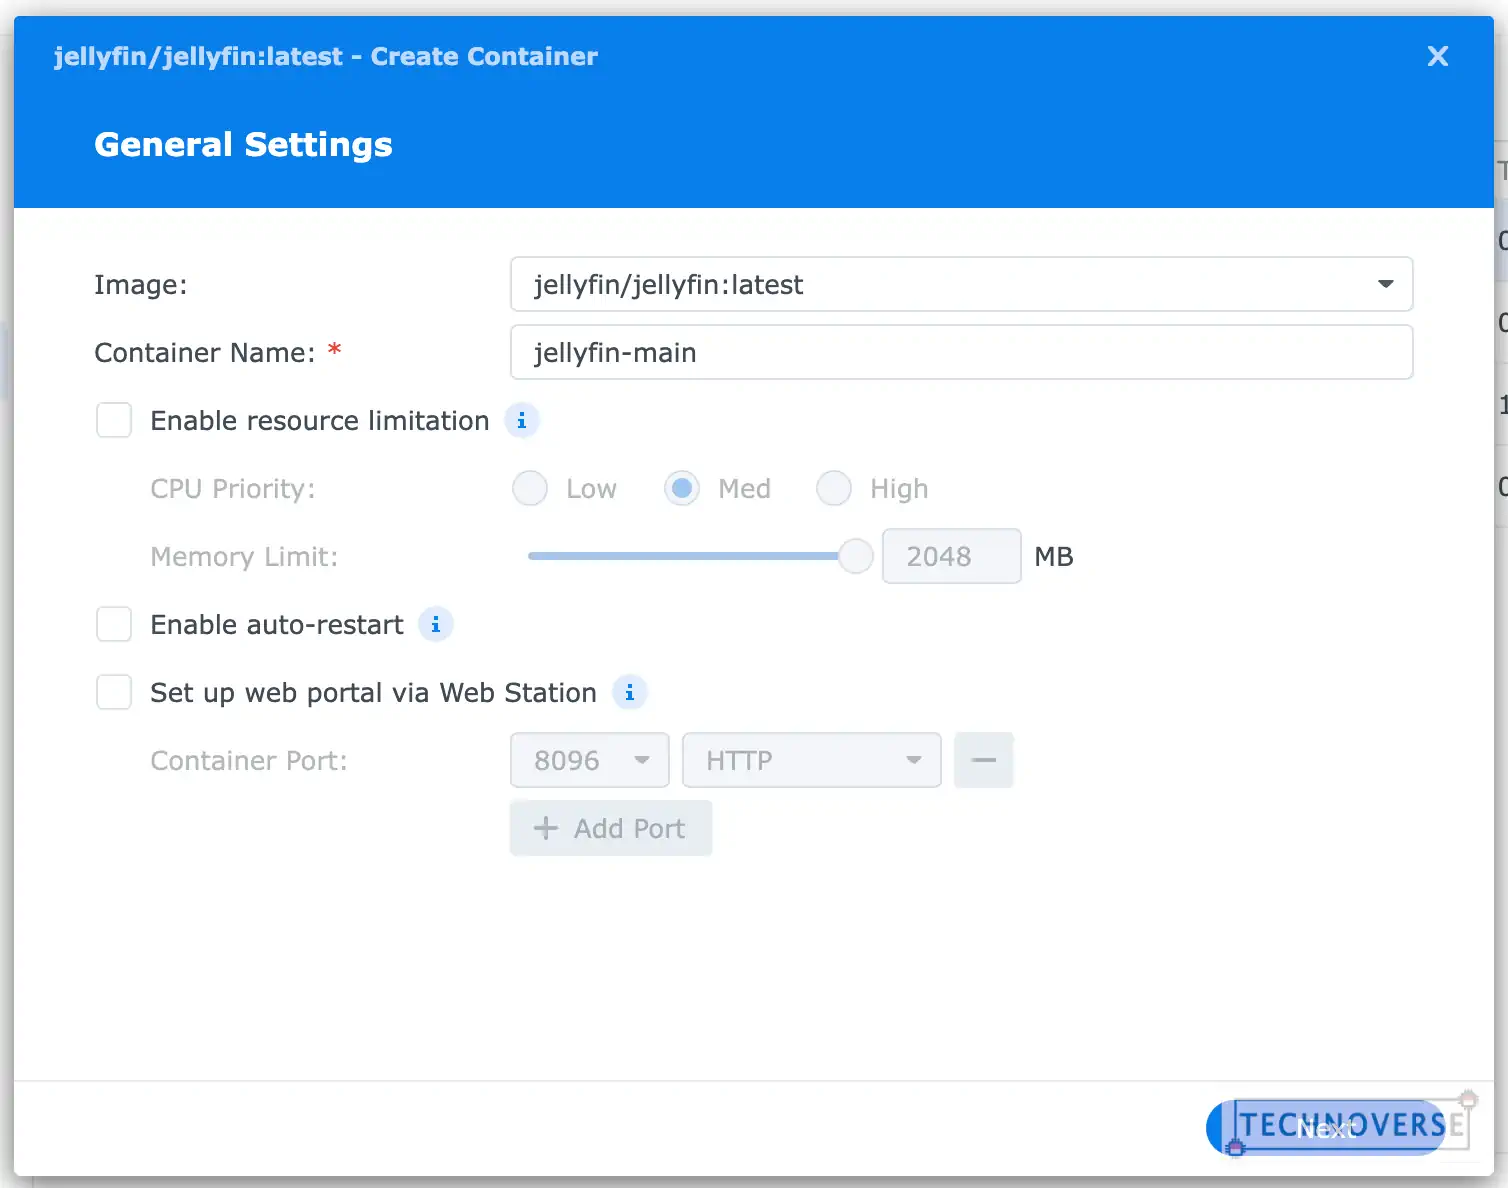
- Use the newly downloaded image as the Image. You can rename the container to anything you want. You can leave the rest to the default or tinker with it if you know what you’re doing. Once you’re done, click Next.
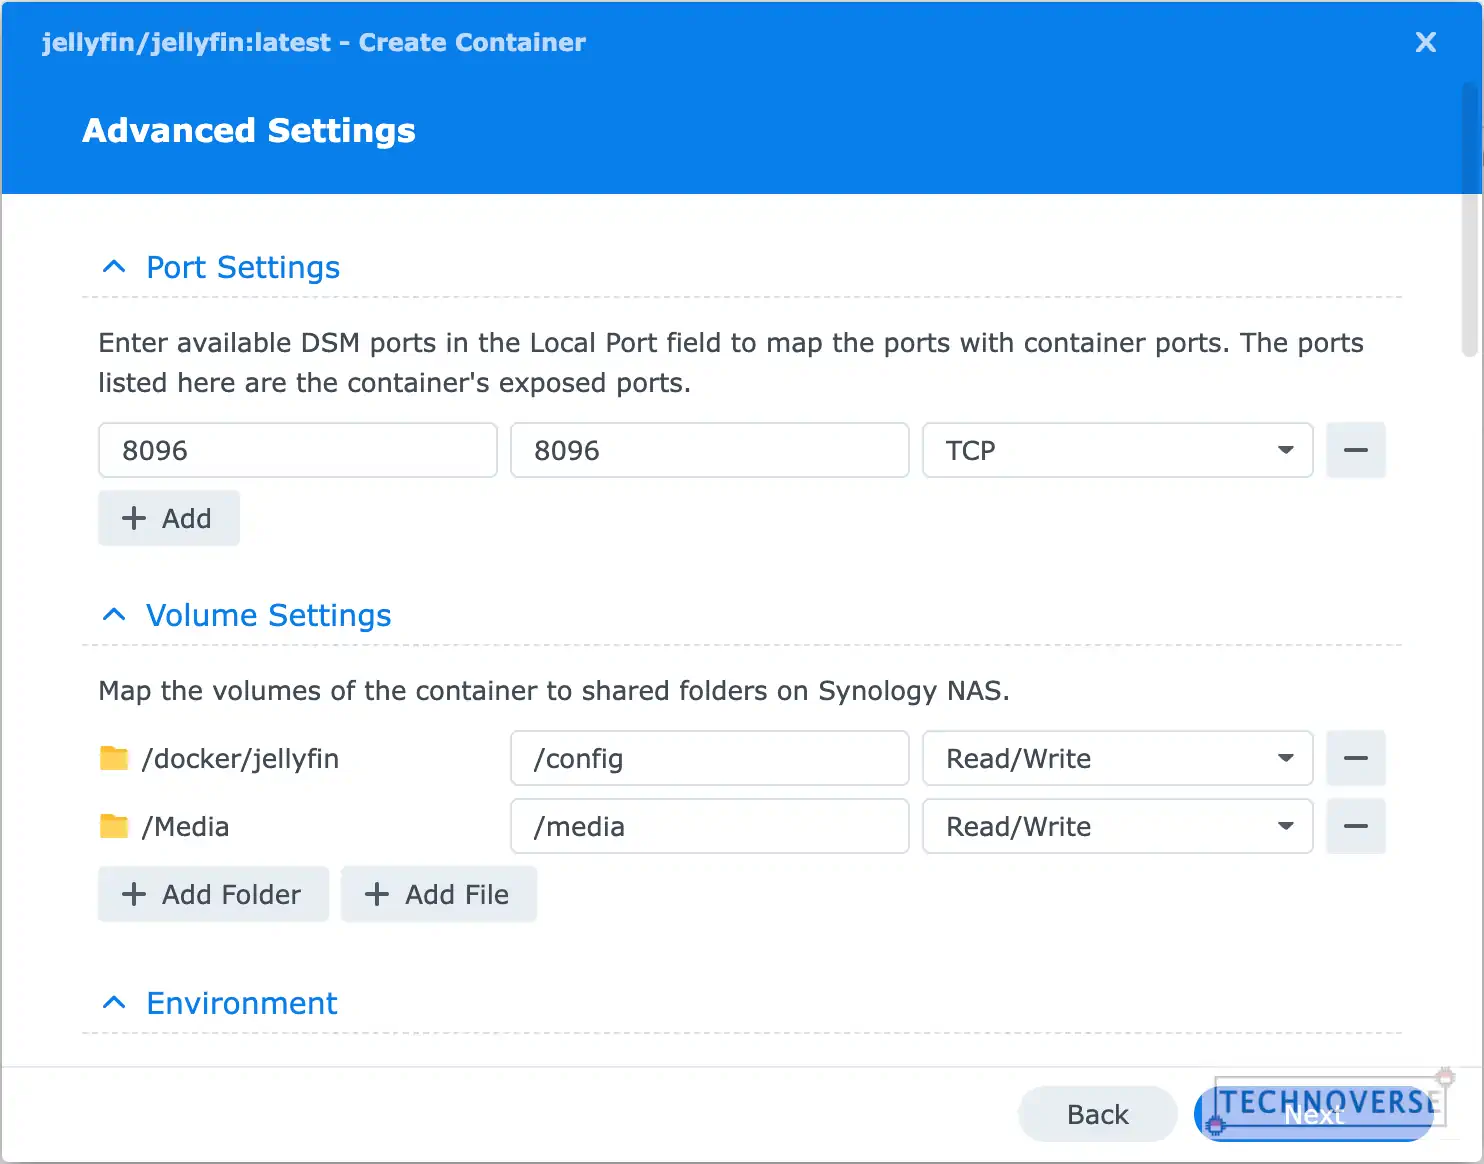
- Fill both fields in the Port Settings section with 8096. This means that you’ll map the container’s port 8096 to your NAS’ port 8096. Later, you’ll use this port to access Jellyfin. You can leave the protocol as TCP.

- For the Volume Settings section, there are 3 directories from the container that you can map to your NAS:
/media: This is where your media files are stored./config: This is where the configurations of your Jellyfin are stored. I recommend mapping this directory in case you need to restart the container, for example, when restarting. Since container volumes are non-persistent by default (except when you map it this way), if your container is restarted, there is a chance that you’ll have to start over again since the unmapped data is lost./cache: This one is optional in my opinion. According to Jellyfin, this may be used for storing cache files such as images. Rather than regenerating them on every container restart, I think it’s better to put it into a persistent storage.
- Click Next to confirm your settings, and start your container.
Once the container is running, you can access Jellyfin through http://<NAS_IP_ADDRESS>:8096, and start the initial configuration.
The initial configuration is pretty straightforward. You can just follow the instructions to set up an account and your first Library, along with other settings. At this time, however, I don’t recommend enabling Remote Play, as we’re going to go through it in a more secure (albeit inconvenient) way.
Once you’re done, feel free to tinker with your new Jellyfin server. Jellyfin supports plugins that enable more functionalities, such as additional metadata sources. You can also manage user accounts for your friends or family members. To stream your content, you can download Jellyfin clients to your devices, and use the same URL as the dashboard to connect in the same network. For a different network? Check out the next section!
Enabling Remote Play
In case you don’t know, Remote Play is a fancy name for streaming your media outside the server’s network. Normally, you’ll need to set up Port Forwarding, but this makes your network more vulnerable to attacks, and not all ISPs allow this. Fortunately, there’s an easier way to do this: set up your own VPN. With a VPN, your devices can securely connect to each other, as if they’re in the same network. Well, a virtual network to be precise.
There are multiple ways to set up your own VPN, but the easiest I’ve come so far (and free!) is by using a service called TailScale. It is compatible with multiple platforms (including Synology’s DSM), and their free plan is quite generous, allowing up to 3 users and 100 devices to be connected in the same VPN.
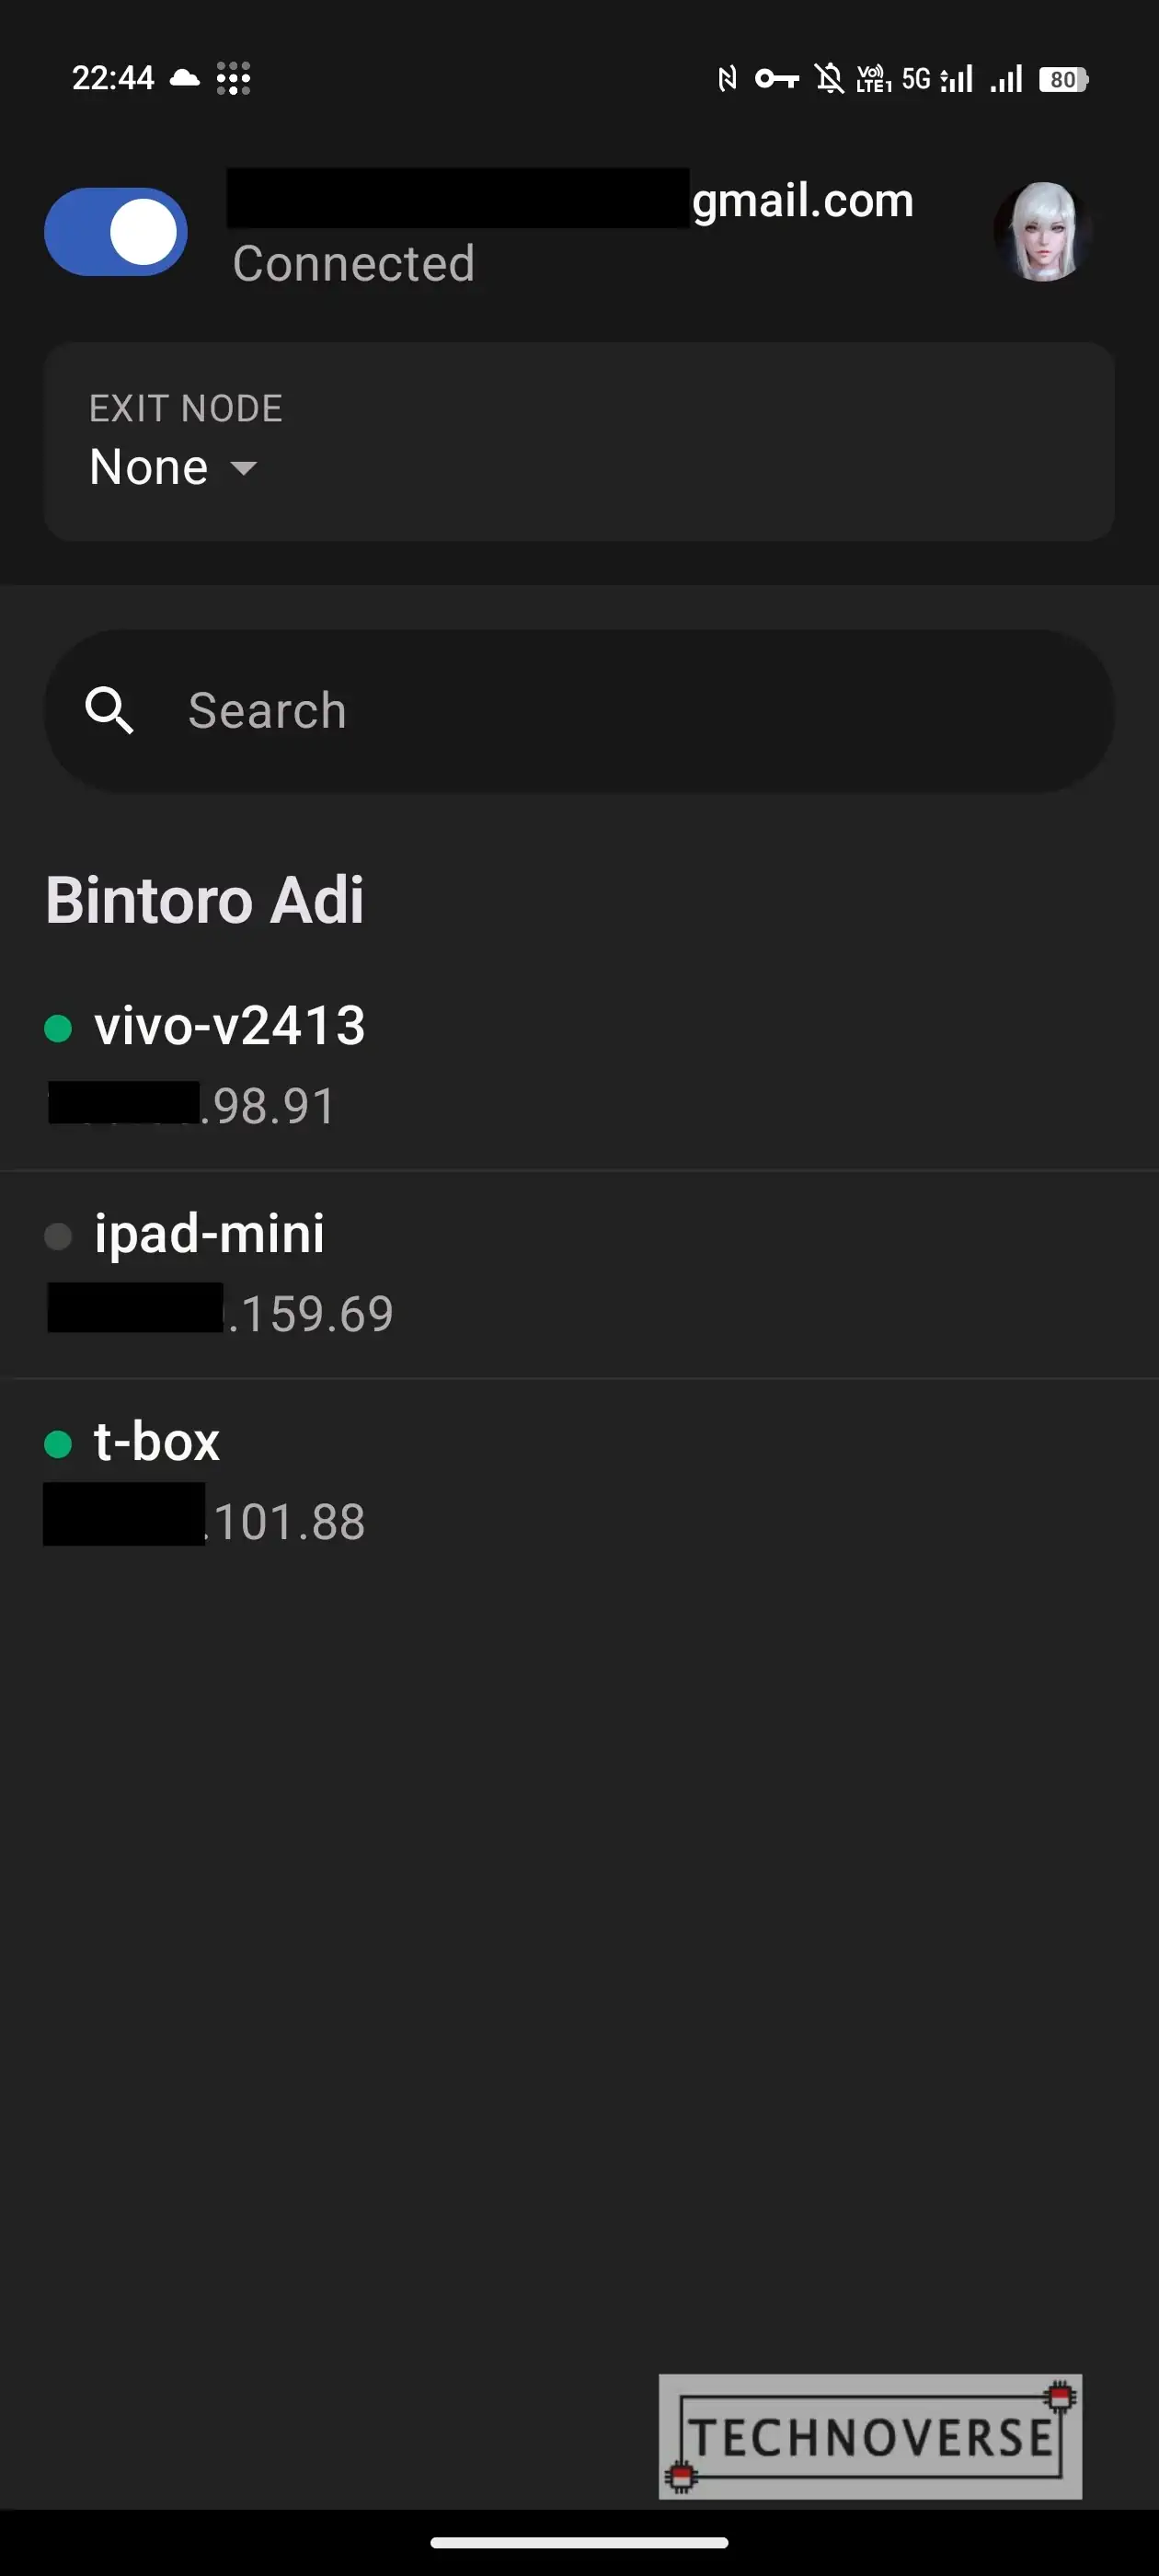
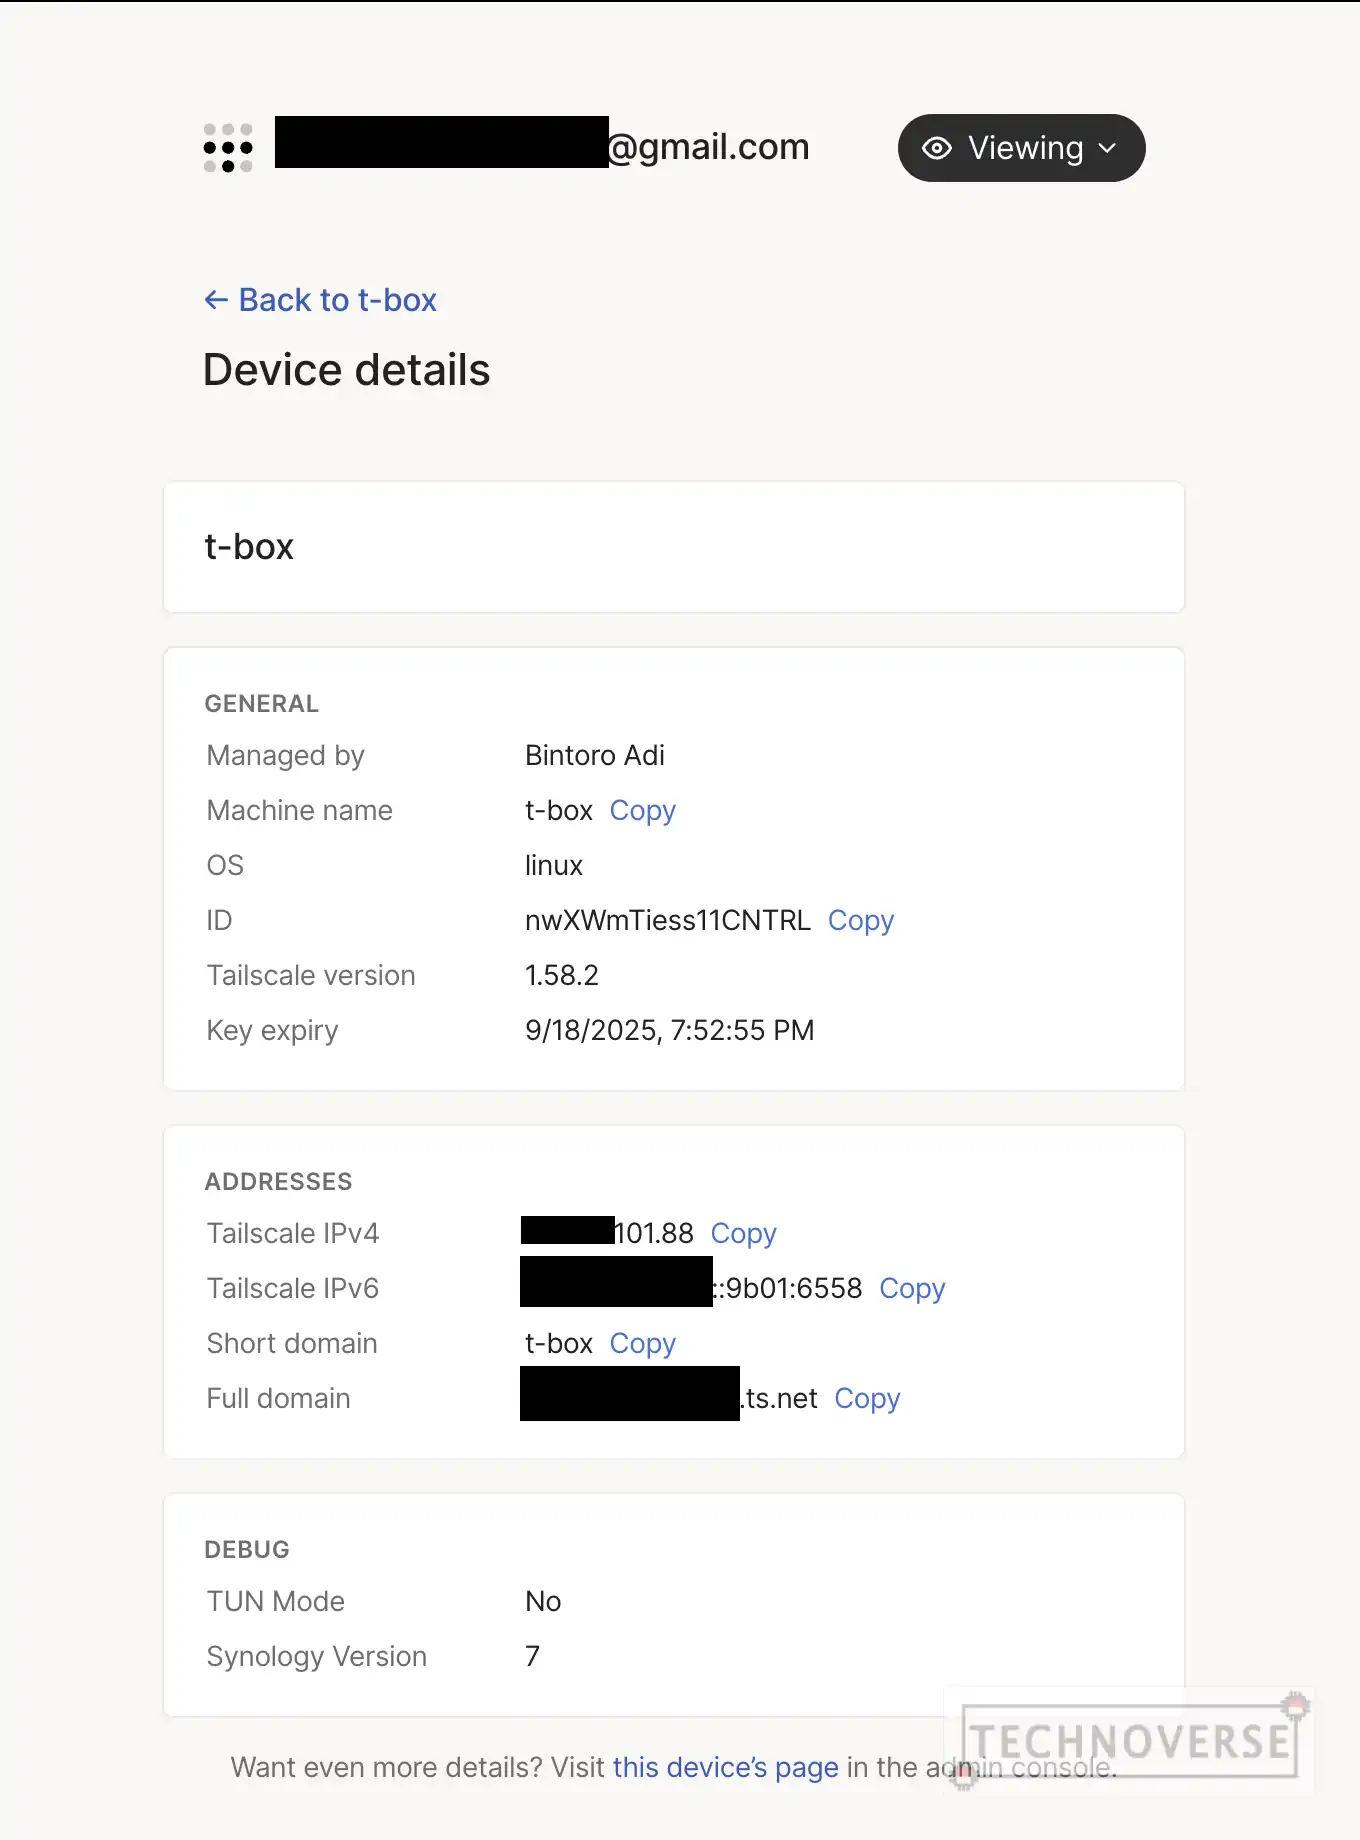
Setting it up is also easy. Install TailScale on your NAS through Package Center, set up your account, enable the VPN on your device, and you’re good to go! Similarly, on another device you want to stream into, download the TailScale client and log in. Use the device’s “internal URL” as the Jellyfin’s server address, and you should be good to go, without even enabling Remote Play or any port forwarding.
Please make sure you’re connected to your personal VPN first.
In case you haven’t guessed, this means you’ll need to connect to the VPN every time you want to stream, but I’d say the security and ease of setup are very well worth the trade-off.
Conclusion
Well, congratulations! Now you have an alternative to Plex, and it’s free, too. Feel free to explore both products and see which one is more suitable for your needs.
Anyway, I guess that’s all for now, Folks. If you have any questions, feel free to post them in the comments below and I’ll do my best to answer, although I’m still new to Jellyfin as well. Finally, as usual, thanks for reading, and see you in the next article! 😄
Comments
Pingback: Memasang Jellyfin di NAS Synology - Technoverse