

Anda berbicara Bahasa Indonesia? Baca artikel terjemahannya di sini!
I wrote an article in the past on how to run macOS via VM. Now let’s assume that you like it, but the storage you assigned to it wasn’t big enough to hold your files. What to do?
Yes, that’s right. Expand them. Assuming that you have that much space left on your hard drive (or SSD, hopefully). It’s not that difficult, I’ll show you how.
Disclaimer: This guide is tested on macOS Big Sur, but this should be compatible with previous versions of Mac that supports APSF disk format, such as Catalina.
Add More Storage in VMware Player
That’s right, since it’s a VM, everything is managed through your VM’s settings. Simply select your Mac VM, then open the VM’s settings. You’ll be presented with the below window.
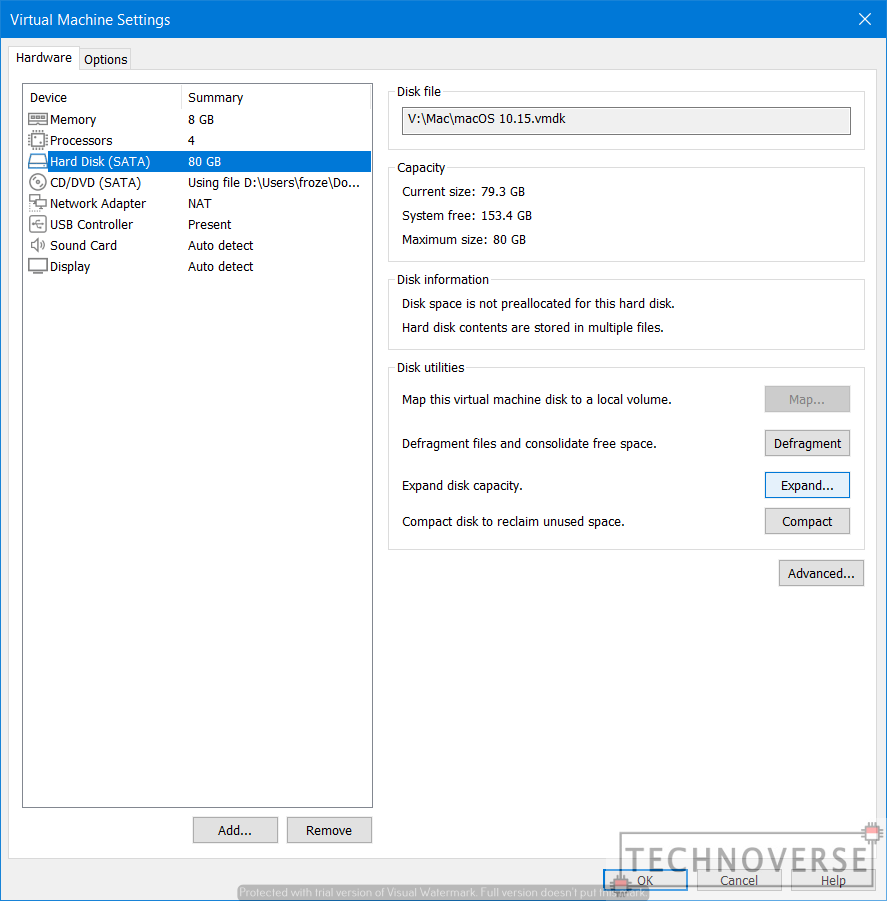
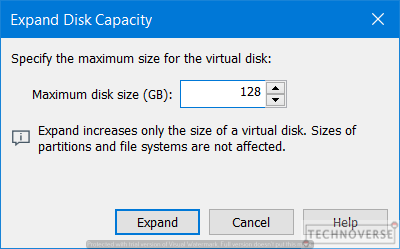
Navigate to Hard Drive section, then click “Expand”. You’ll be presented with a dialog with a number input. Input the new disk size you want. In my case, I’m increasing my VM disk size from 80GB to 128GB.
Once that’s done, save and apply your settings. Next, we’ll need to reconfigure our partition inside the Mac VM.
Reconfigure Storage Size in Mac
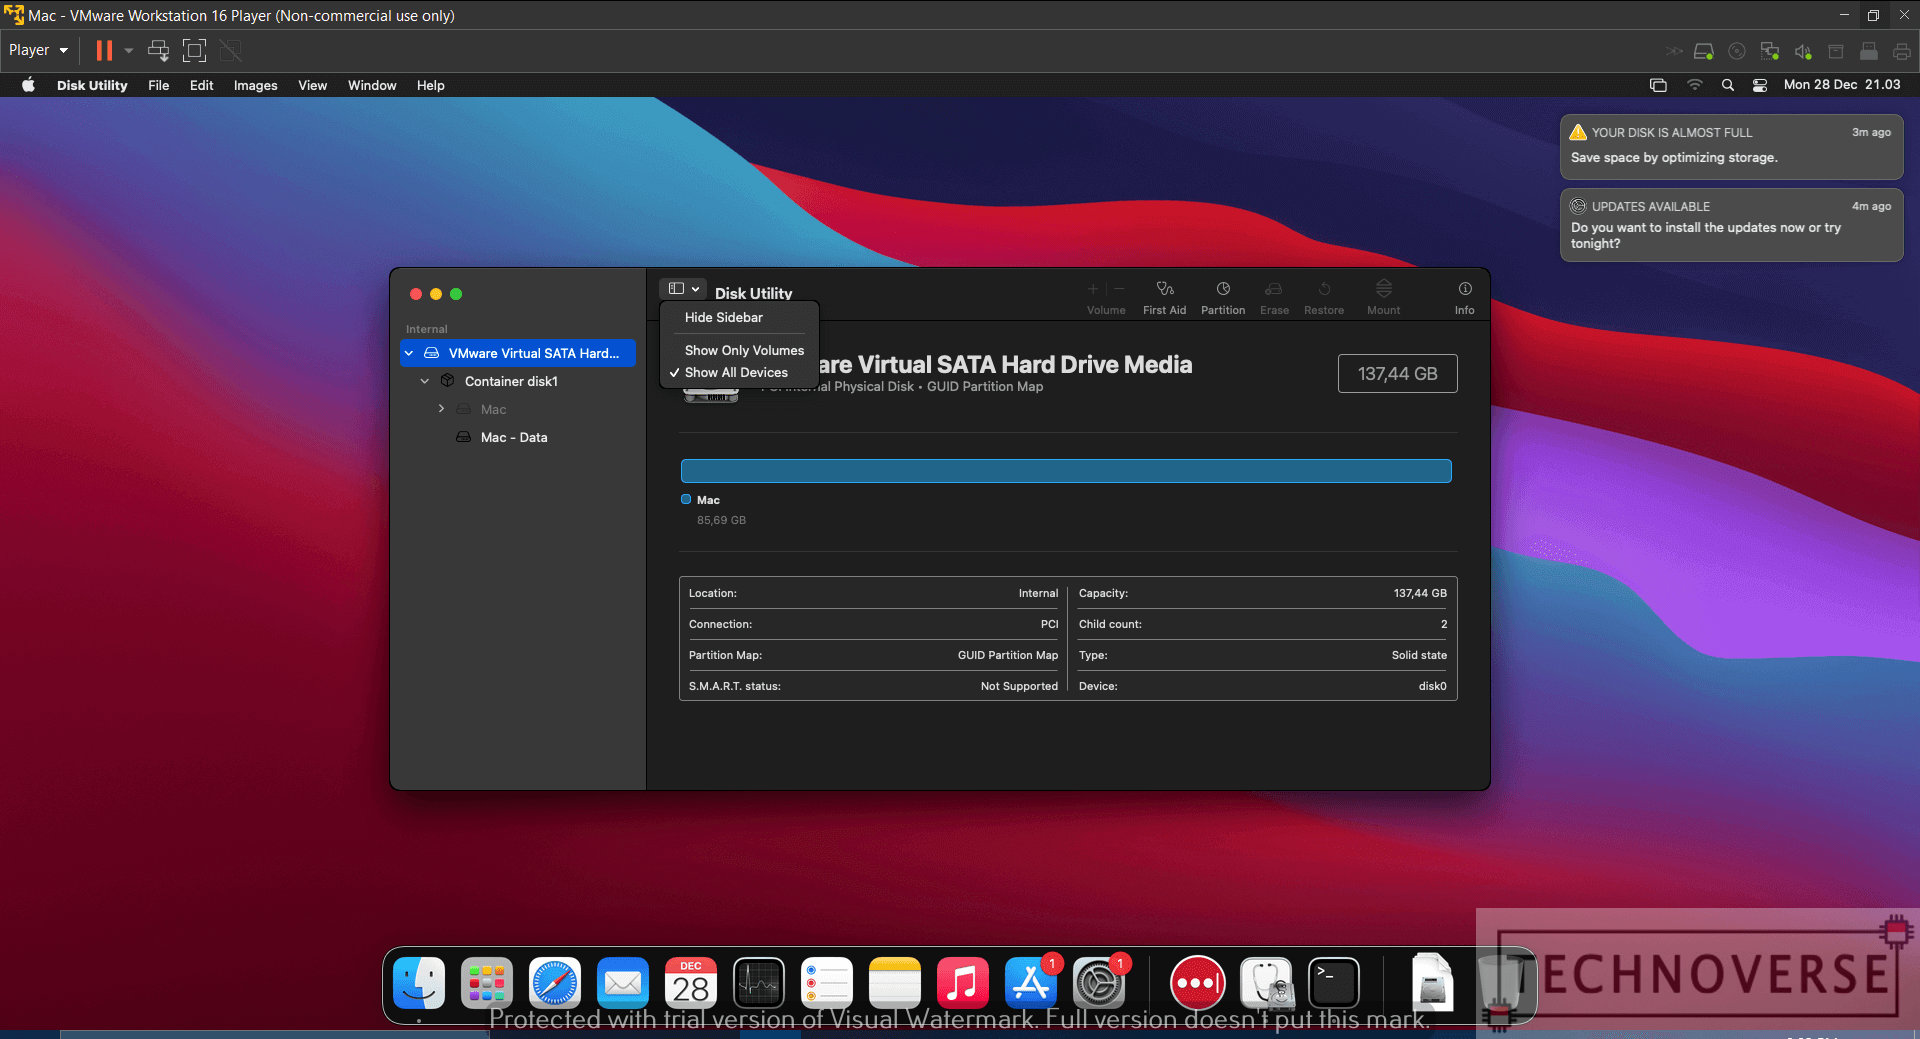
In your Mac VM, open Disk Utilities. If your disk size has not changed, don’t panic, since by default, macOS will show you your current partition size. What you want to do is to click on the More menu on the left side of the window title, and check Show All Devices option. You should see the VMware Virtual SATA Hard Drive Media. This is your virtual disk. Its capacity should increase.
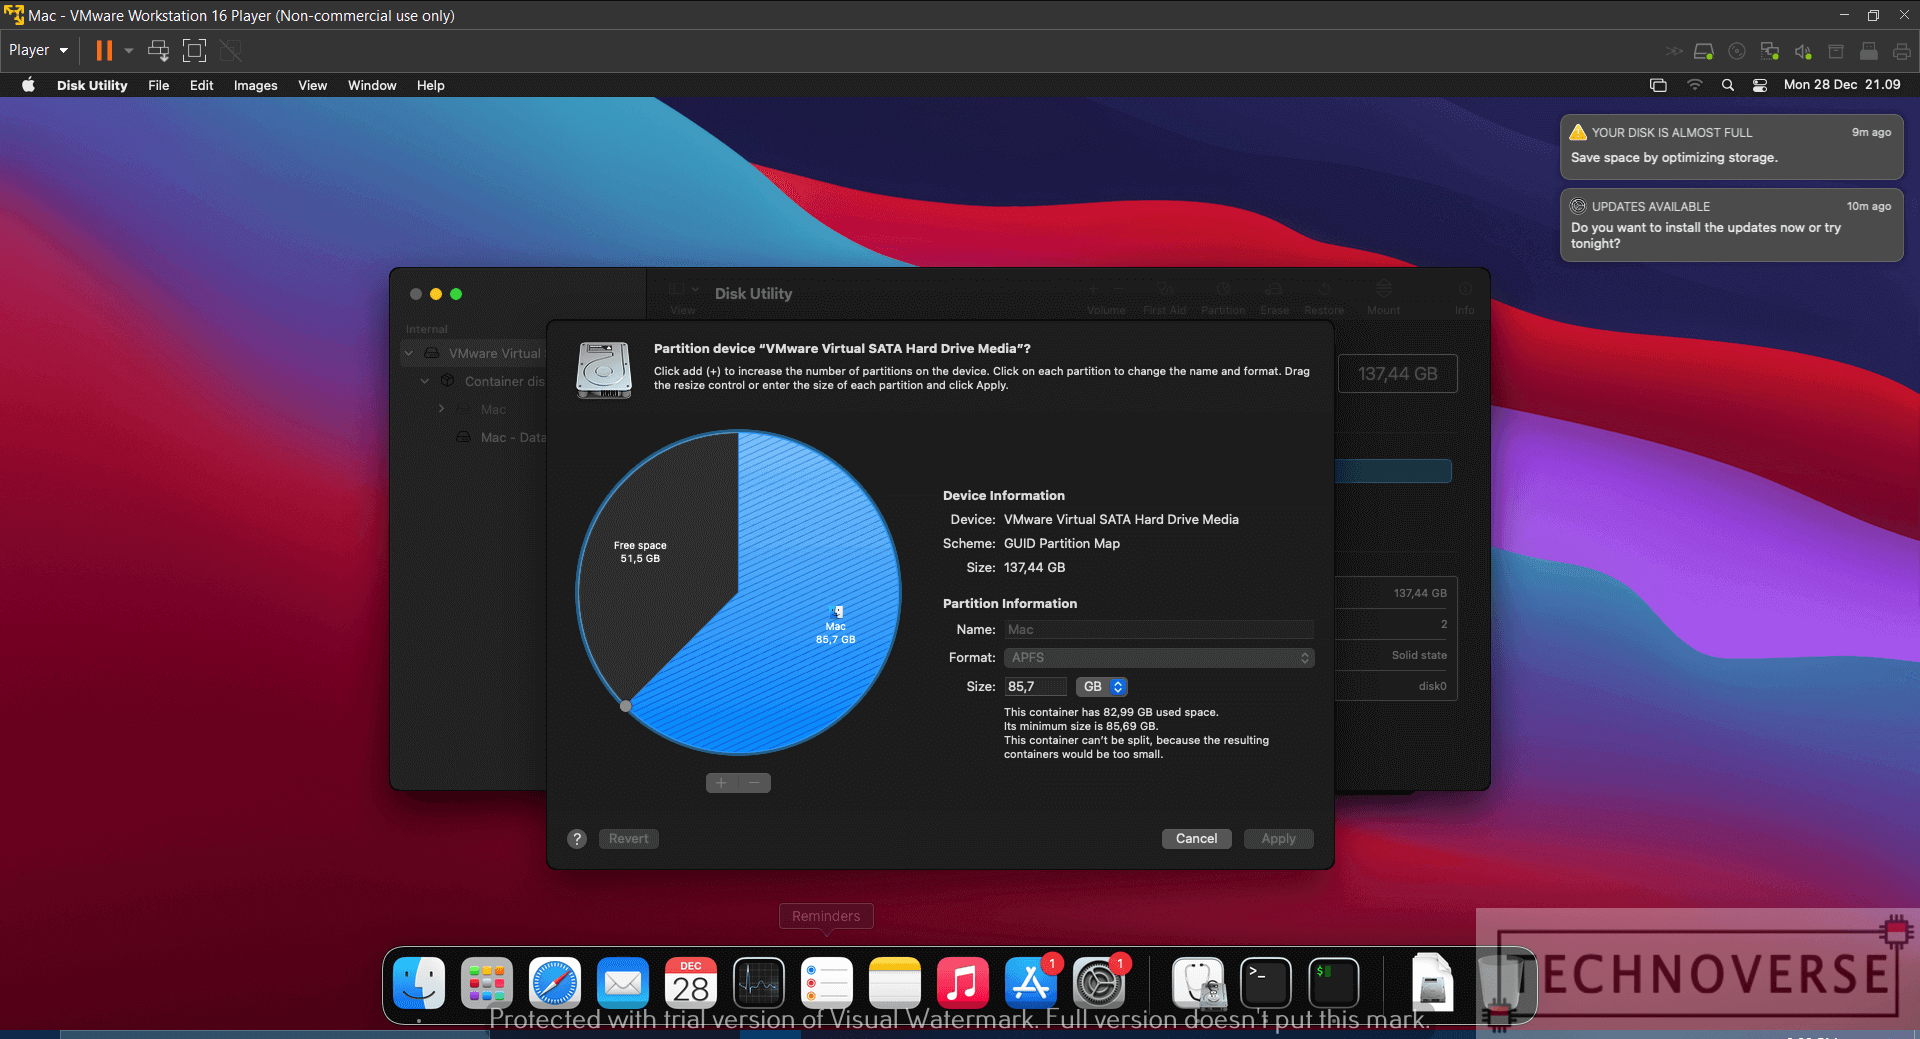
If you want to see how much free space you have (Unallocated Space in Windows), you can open the partition information by clicking on Partition on the top right side of the Disk Utility, and select Partition. You should see the window below.
One way to quickly resize our partition is by using the Terminal. Don’t be intimidated; as long as you follow this guide correctly, everything will be fine. So, let’s fire up the terminal.
The next thing to do is to identify which partition to resize. To do this, we need to show the list of all the disks registered in our VM. To do this, run the following command:
diskUtil list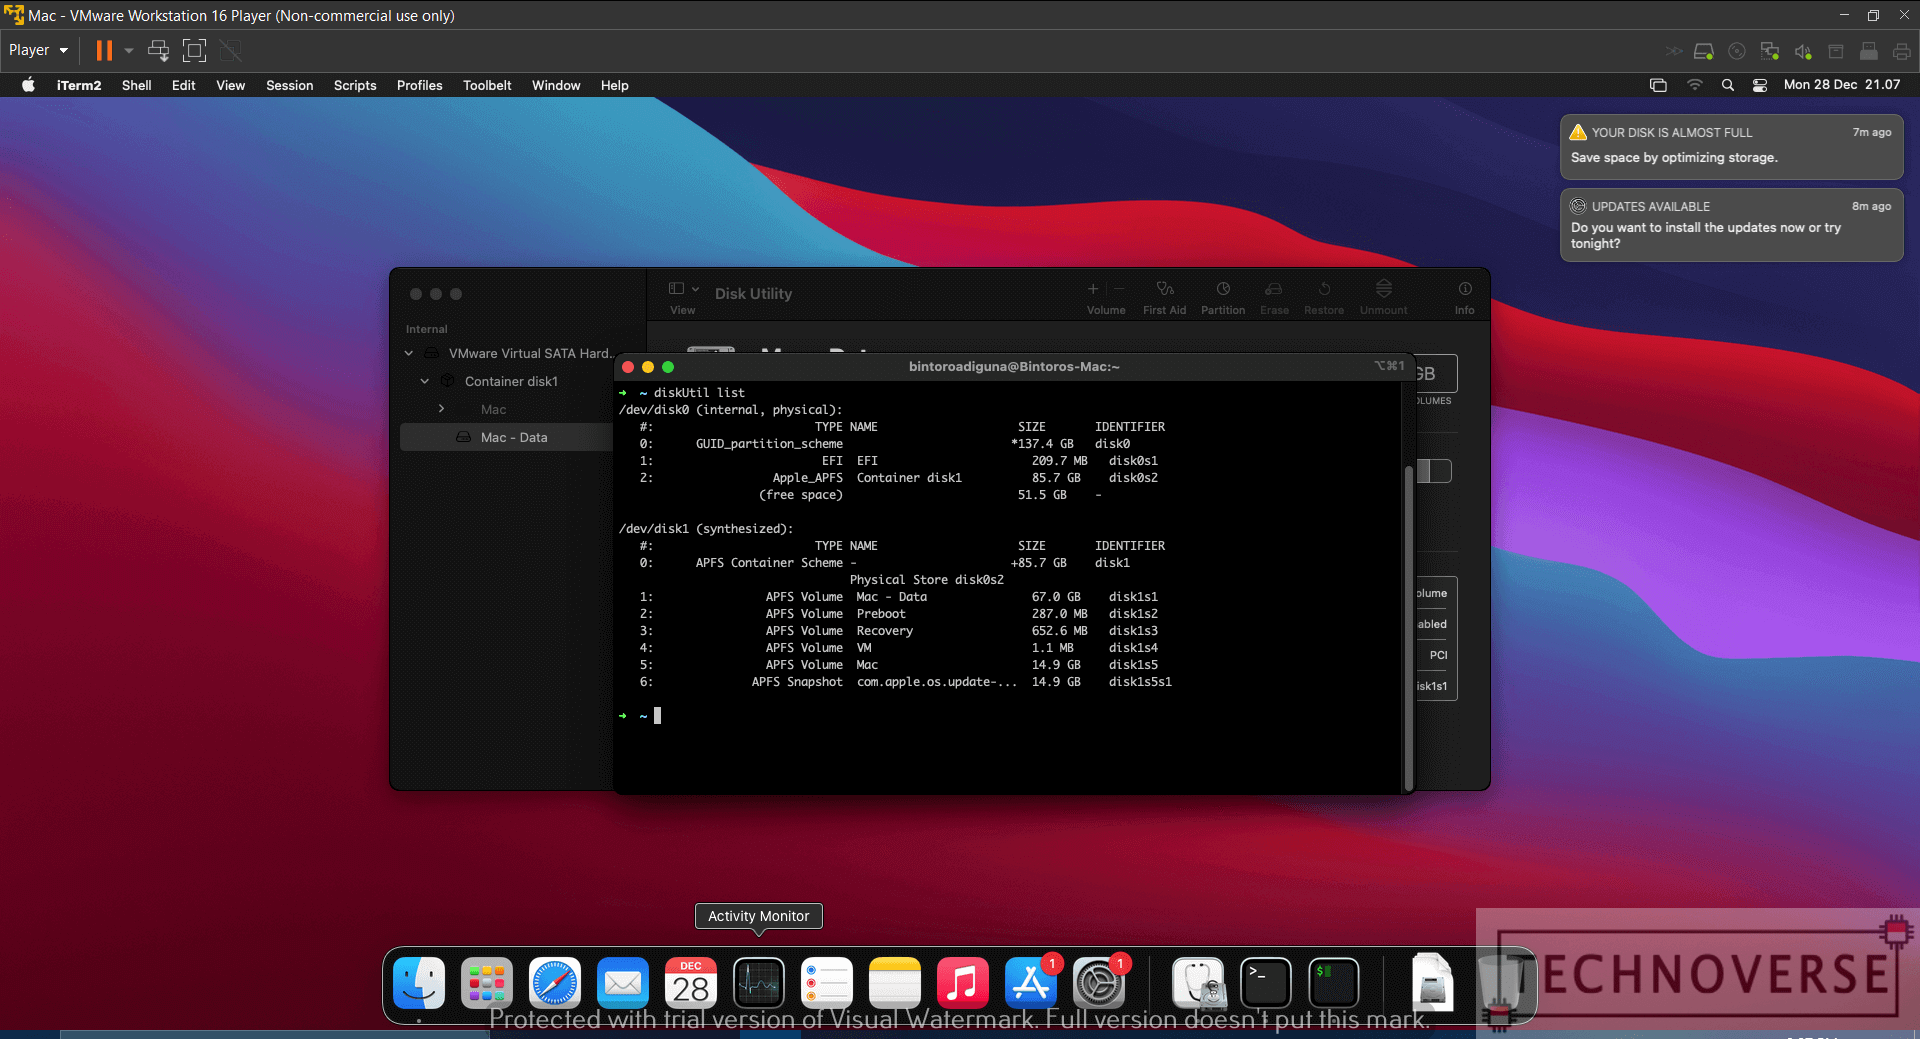
From the result above, we can disregard the synthesized section. Also, we can see that my main storage is called Container disk1, identified as disk0s2, in the internal, physical section. We can also conclude that we have 51.5GB of unallocated free space.
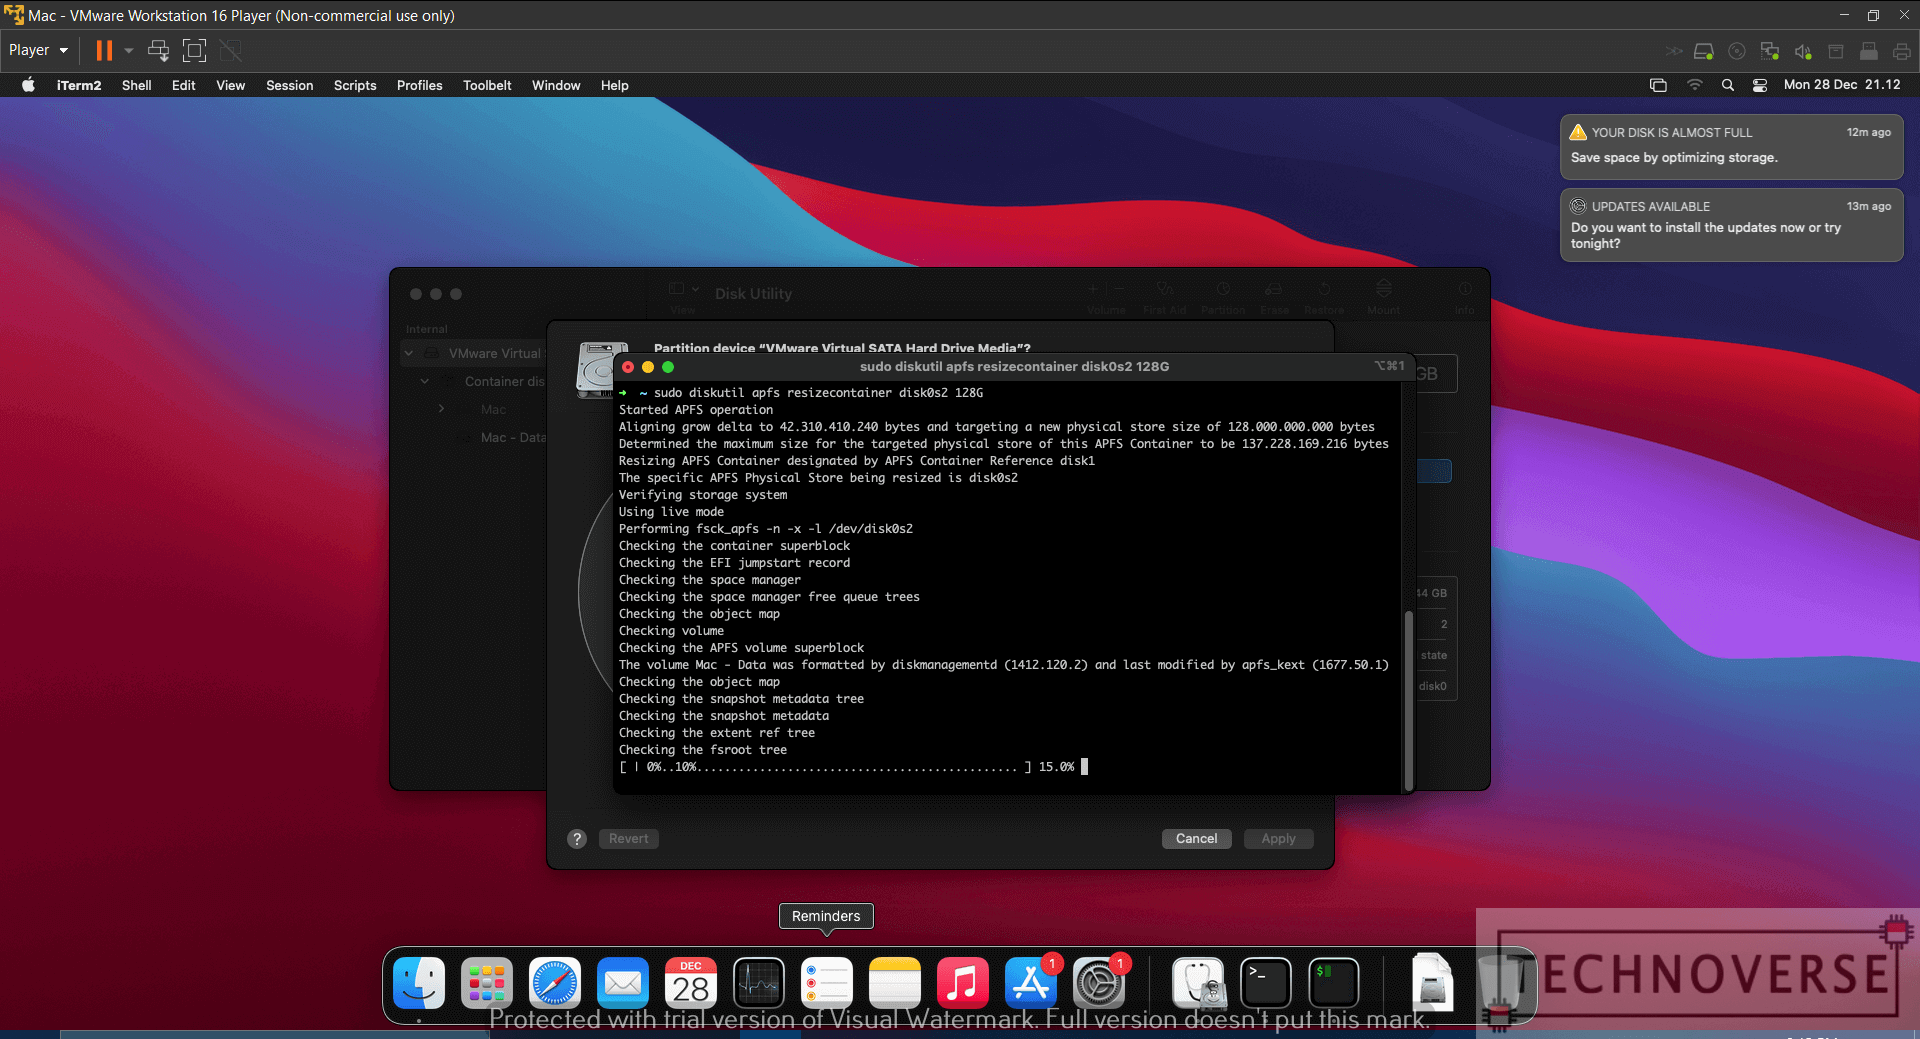
Now, the next thing to do, is to run the resize partition command. Run the following command:
sudo diskutil apfs resizecontainer disk0s2 128GThat command basically runs the resizecontainer command for APFS-formatted disk (the one we’re using). The command will resize the disk0s2 partition to 128G (128GB). Of course, depending on your system configuration, you might need to update the disk identifier and final size. But that’s basically it. Let the Terminal do the rest.
You’re Done!
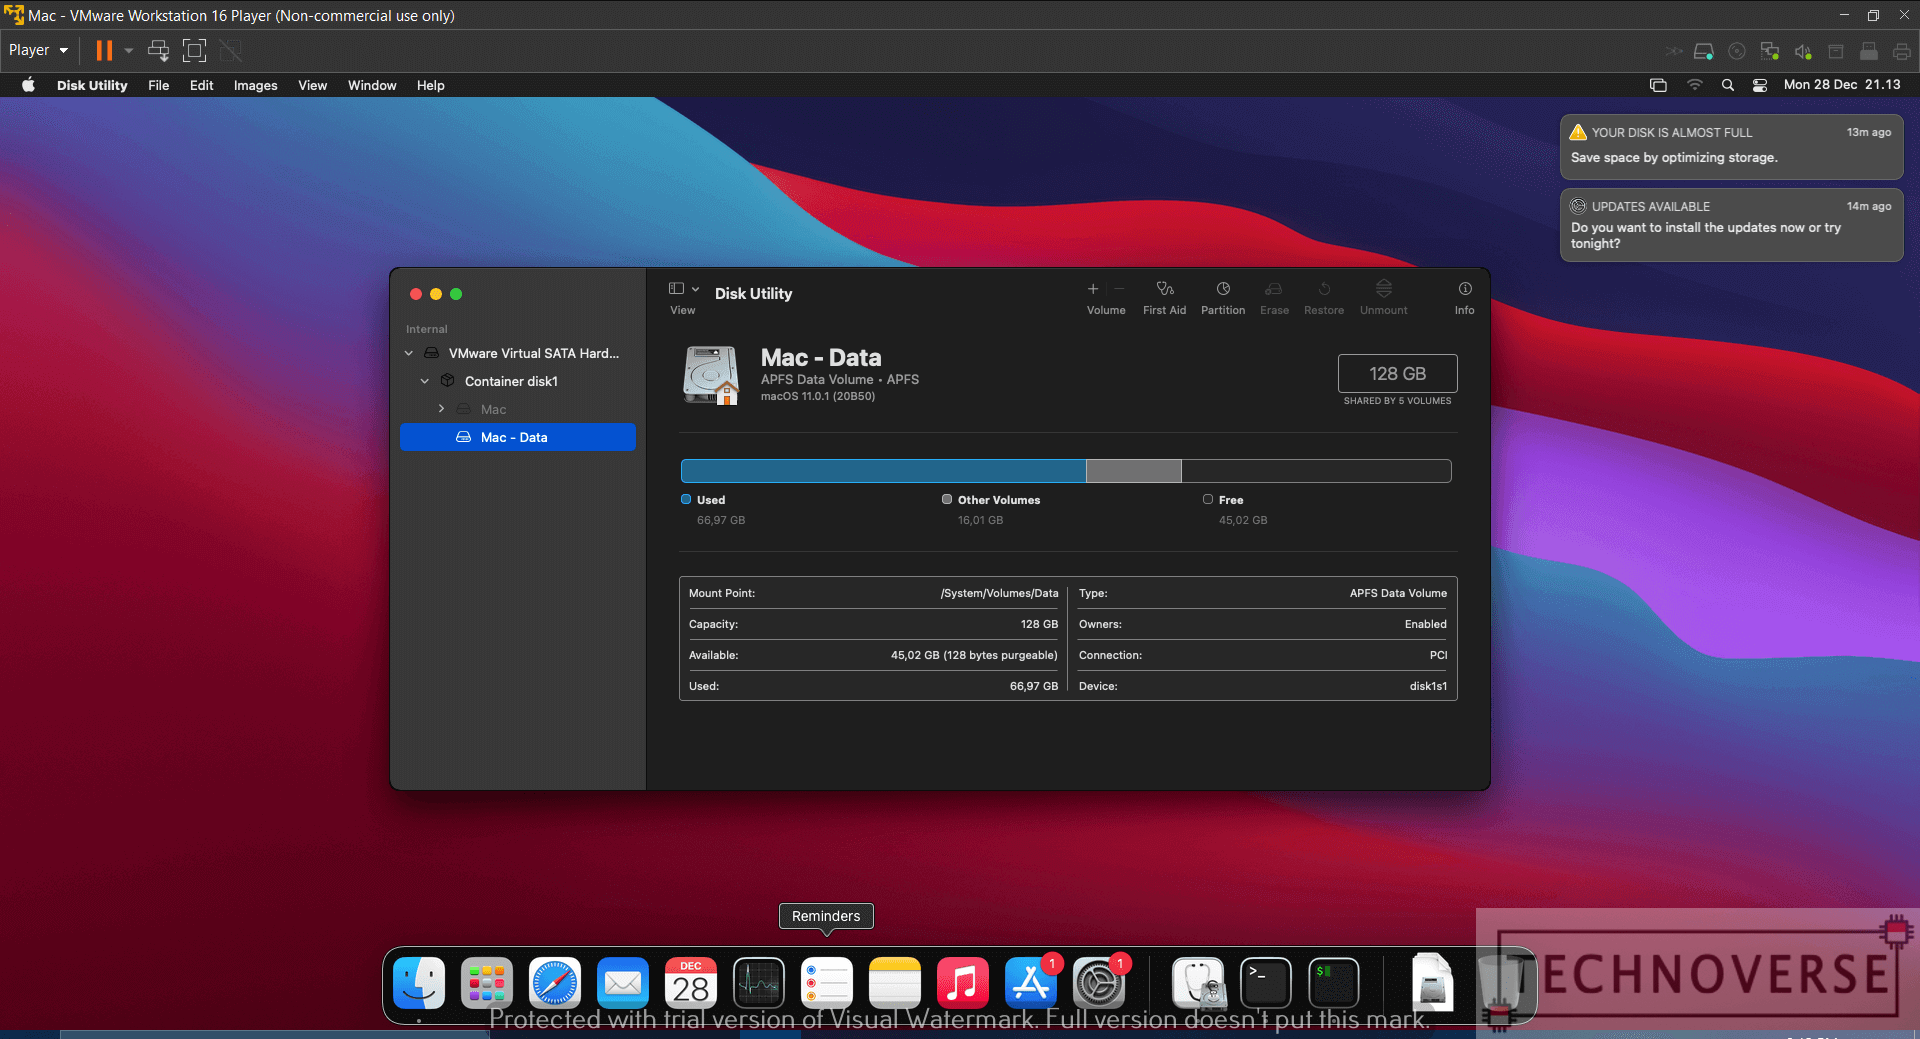
Once you’re done, you can reopen Disk Utility and your system storage should increase. Congratulations! You now have more storage in your Mac VM.
Conclusion
Well, now you’ve learned how to resize your Mac VM’s storage. Not that difficult, right? You should also be able to use the same command if you’re somehow able to upgrade your Mac. So, I guess that’s it for now, Folks. Thanks for reading, and look forward to the next article. Stay safe!